IT'S CHRISTMAS TIME
Christmas season is always best if you spent it with your family. You get to laugh, enjoy good food and the company of your loved ones. And this is how me and my family spent it. We first ate a sumptuous dinner then we attended a mass. After the mass we went home, took pictures and ate our noche buena. However, Christmas eve is not about preparing lots of food, it is by celebrating its true meaning. Which is to share your blessings and happiness. Just like what the priest quoted, "It is easy to think of Christmas, it is easy to believe in Christmas but it is difficult to act out Christmas."
DIY: TSHIRT CUFF
Being a fashionista doesn't mean over accessorizing or buying all the latest trends in the market. You can still be one, if you know how to use your resources. Just like what I did with my old shirts which I turned to tshirt yarn into tshirt cuff. This was really a great idea especially if you have old tshirts stocked at your closet. Now, I'm gonna show you how...
(the brown and pink cuff is another style)
Materials:
Tshirt yarn
Scissors
1. Prepare 6 tshirt yarn. (to know how to make a tshirt yarn TSHIRT YARN) Color depends on you. (mine is, 2 pinks, 4 violet) You should make a knot first and taped it to a table.
2. Make a knot with the left yarn in first then the right yarn.
3. After the left yarn goes in, let the right yarn followed.
4. Let the right yarn goes inside the left yarn.
5. Tighten the knot.
6. This should how it look. Repeat steps 2-6 until it reach the end.
7. Place it in your arm and make a knot to the first top knot you made. Then trim excess yarn.
8. Voila your done! :)
Always remember...Be Positive & Be Creative! :)
DIY: TSHIRT SHOELACE
I was never thinking I could use the tshirt yarn as a shoelace, not until I took a glimpse on my shoes. I immediately got the idea and decided to replace my old shoelace. It matched perfectly and it looks great on it.
Always remember...Be Positive & Be Creative! :)
DIY: CUT OUT SHOULDER
Cut Out Shoulder are very trendy in the fashion scene. It shows that every woman could be fashionable in the clothes they wear and not by over accessorizing. Thus, I wanted to show you how I made my own Cut Out Shoulder. Here it is...
Materials:
Tshirt
Scissors
Needle
Thread
2. Lay it flat and make a curve mark starting from the shoulders to the sleeve. Then cut it.
3. Fold the shirt lengthwise and trace the cutted right sleeve to the left sleeve and cut.
Just like what I did with my DIY: RACERBACK WORKOUT SHIRT
5. Fold a few centimeters of the sleeve (from the shoulder to the arm) inwards and sew. Do the same with the other side.
6. Fold also a few inches of the sleeve (at the arm portion) inwards, depends on how big is your arm and sew.
7. Tada! your done :)
Now, you can enjoy your own Cut Out Shoulder and can brag to your friends.
Always remember...Be Positive & Be Creative! :)
FEEL THE SPIRIT OF CHRISTMAS WITH PUTO BUMBONG
It's the month of December and Filipinos have the longest celebration of Christmas. When speaking of December, one thing is on my mind...to eat Puto Bumbong! It only started last year when I fell in love with it. Here in our city, I seldom see someone cooking or selling it. Thus, when I saw it in our plaza I decided to have a try and I liked it.
Actually, Puto Bumbong is a Filipino delicacy that's traditionally served during the Christmas season. It is a steamed glutinous rice cooked in a bamboo. The purple color comes from the mixture of sweet rice and black rice. It is served with butter or margarine, sugar and freshly grated coconut on top.
I really loved the taste of it. It's chewy and I can taste the sweetness of the margarine,sugar and coconut. It only cost 20 pesos and your good to go. A must-try filipino delicacy.
DIY: SHORTS MAKEOVER
Do you have an amazing way of designing your favorite shorts? If you have then it's great but if you don't have, I'll show you how.
Materials:
Shorts
Cloth or Shirt (with design you want)
Scissors
Needle
Thread
1. Look for a cloth or old shirt with a good design. Measure and cut a large square just enough to cover the one side of the jeans.
2. Place the finished cloth or shirt on top of the jeans where you want to sew it.
3. Fold the edge of the cloth a little before you sew it to give a clean look.
4. Align the cloth and start sewing. Make sure to sew all sides to secure it in place.
Always remember....Be positive & Be creative! :)
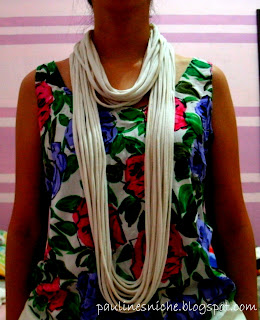
DIY: TSHIRT NECKLACE
If you like wearing unique pieces and has tons of old shirts, then a tshirt necklace is perfect for you. Having great pieces like these shows your hippie side. It is also best use during Christmas season where the weather is a bit cold.
Materials:
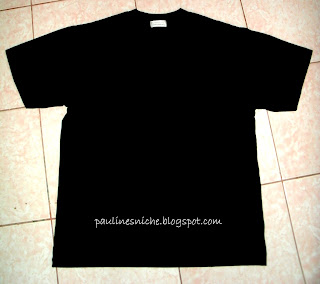
Old tshirt
Scissors
1.Get an old tshirt. Cut the bottom hem then start cutting the shirt horizontally. You can cut as many strips as you want.
2. Stretch the remaining strips until it goes long and it curls.
3. Get the bottom hem and cut the other end. Use it to knot around the strands to secure them in place.
3.Wrap the strip a few inches around the strands. Then trim the loose ends and tuck the knot underneath the fabric.
4. And viola!..your done :)
Always remember....Be positive & Be creative! :)
BRIGHTEN UP YOUR 2013 WITH EMERALD GREEN
It's great to know that every year, Pantone Color Institute chooses a color that's vibrant and fun. Having this emerald green for next year would show being one in nature. I think it's a great color everyone would love since, we can see green everywhere in our environment. I'm now excited for fashion trends next year that would utilize the color of the year which is emerald green. :)
Read more:
http://newsfeed.time.com/2012/12/10/pantone-names-emerald-as-color-of-the-year-for-2013/
DIY: RACERBACK WORKOUT SHIRT
Are you a gym enthusiast? If yes, then this is the perfect diy for you.
Recently, I have fell in love with zumba. I have been dancing for a week now and I had fun doing it every morning. However, I was a little bit uncomfortable with my workout attire. As a workout or gym lover it is important to wear the most comfortable outfit whenever you are in session. The reason for this is that having the suitable clothing helps you move easier. Thus, I decided to do this diy. So, here it is....
Materials:
Old tshirt (the bigger the better)
Scissors
1.Get your old tshirt.
2. Cut the neckline and bottom hem. Put aside the bottom hem. For the sleeves, cut downward starting from the shoulder and curve outwards down below the armpit seam. It depends on how thick you want your straps. Do the same to the other side.
3. Cut how low you want your front neckline.
4. Do the same to the back neckline, but this time make it more narrow.
5. Using the bottom hem, stretch it out until it becomes one long fabric. Knot the string a few inches above the bottom of the v-shape. Wrap the string upwards until you reach the top and make a knot. Trim the loose ends.
6. Lay your shirt sideways and cut diagonally. This will give your shirt a high-low look.
7. Done!!!
This diy was very helpful to my daily workout. I can move freely and comfortably. I hope you guys could try this too. Simple, easy and not time consuming. Actually, I have already made 3 workout shirts and I enjoyed wearing them.
Always remember....Be positive & Be creative! :)
DIY: SCALLOP SHORT
Tired of your same old boring shorts?
If your bored of using it, you can add studs or lace or you could cut some part of it to get a new look. Just like what I did with my shorts. Here's how to do it.
Materials:
Scissors, Button pin, Colored pencil
1. Place the button pin on your shorts and trace the curve or angle where you want it to be.
2. Cut the jeans following the colored mark.
3. Do the same to the other side.
....And your done! Simple, easy and creative.
If you like you could also add some studs, spikes to look it more interesting. It all depends on your own style. Always remember.... Be positive and be creative! :)
DIY: BLOUSES TO BANDAGE SKIRT
I found the idea of turning long sleeve blouses to bandage skirt when I was surfing the web. I got it from a site and decided to try it on. I always loved exploring on diy fashion and fashion blogs. Thus, having the idea and creativity I was able to create one. So, here it is...
So if you have long sleeve blouses you seldom use, try to make it as a bandage skirt. In that way, you can help our environment and at the same time lessen your stocked old clothes.
So if you have long sleeve blouses you seldom use, try to make it as a bandage skirt. In that way, you can help our environment and at the same time lessen your stocked old clothes.
VINTAGE FASHION ROCKS
Few weeks ago, I was hooked to do it yourself (diy) fashion. What caught me the most was the diy for old tshirts. I kept surfing the net until I decided to create one. Thinking we have lots of old tshirts, I started to open plastic bags where the shirts where kept and search for usable ones. After a few minutes, I found vintage items which I can add to my wardrobe. These items were my mom's outfits during the 90's when she was still working. I continued to look for more until I was able to find these great and gorgeous pieces:
Floral Jumpshort
Long Sleeve Dress
Checkered Blazer
High Waist Skirt
Maxi Skirt
Subscribe to:
Posts (Atom)


